
단계별 실습
| 단계 | 주제 | 이유 |
| 1 | DispatcherTimer로 주기적으로 UI 업데이트 | 주기적 폴링 구조 (→ PLC 값 읽기 타이머 기반) |
| 2 | DTO 클래스 + 자동 속성 실습 | 온도값, 시간, 상태 등 데이터 구조 익히기 |
| 3 | 간단한 ViewModel 구성 + Binding 연습 | MVVM 구조 준비, XAML과 데이터 연결 이해 |
| 4 | PLC 통신 프로그램 | PLC와 MC Protocol 보내고 받기 구조 연습 |
| 5 | LiveCharts2로 실시간 그래프 출력 | 온도 추적 시각화 기반 구현 |
1단계: DispatcherTimer로 주기적으로 UI 업데이트
- 목적: PLC 없이도 1초마다 무언가를 실행하는 구조 이해
XAML 파일
<Window x:Class="WpfApp1.MainWindow"
        xmlns="http://schemas.microsoft.com/winfx/2006/xaml/presentation"
        xmlns:x="http://schemas.microsoft.com/winfx/2006/xaml"
        xmlns:d="http://schemas.microsoft.com/expression/blend/2008"
        xmlns:mc="http://schemas.openxmlformats.org/markup-compatibility/2006"
        xmlns:local="clr-namespace:WpfApp1"
        mc:Ignorable="d"
        Title="실습 모니터" Height="450" Width="800">
    <Grid>
        <Label x:Name="lblTime"
               Content="시계 초기화 중..."
               FontSize="24"
               HorizontalAlignment="Center"
               VerticalAlignment="Center"></Label>
    </Grid>
</Window>C# 파일
using System; // C# 표준 라이브러리
using System.Windows; // WPF 기본 구성요소
using System.Windows.Threading; // DispatcherTimer 클래스가 정의도니 네임스페이스

namespace WpfApp1
{
    // Window를 상속받음, WPF에서 하나의 창이라는 의미
    // partial은 이 클래스가 XAML과 연결되어 있다는 표시이다.
    public partial class MainWindow : Window
    {
        // 맴버 변수 : 타이머 선언
        // DispatcherTimer는 WPF에서 UI 스레드에서 안전하게 사용할 수 있는 타이머
        // System.Timers.Timer는 백그라운드 스레드용으로 UI에 접근 불가
        // 언더바(_timer)는 관습적으로 Private 변수를 나타낸다. (C++의 m_timer와 유사)
        private DispatcherTimer _timer;

        // 생성자 : MainWindow()
        public MainWindow()
        {
            // XAML에 정의한 UI 요소를 불러와서 메모리에 연결하는 함수
            InitializeComponent();

            _timer = new DispatcherTimer();             // 타이머 객체 생성
            _timer.Interval = TimeSpan.FromSeconds(1);  // 1초마다 Tick 이벤트 발생
            _timer.Tick += Timer_Tick;                  // 이벤트 핸들러 연결
            _timer.Start();                             // 타이머 시작
        }

        // 이벤트 핸들러
        // Tick 이벤트가 발생할 때마다 호출되는 함수
        private void Timer_Tick(object sender, EventArgs e)
        {
            // Label의 글자를 바꾸는 코드
            // $"문자열 {변수}" : C#의 문자열 보간 기능
            lblTime.Content = $"현재 시간 : {DateTime.Now:HH:mm:ss}";
        }
    }
}결과

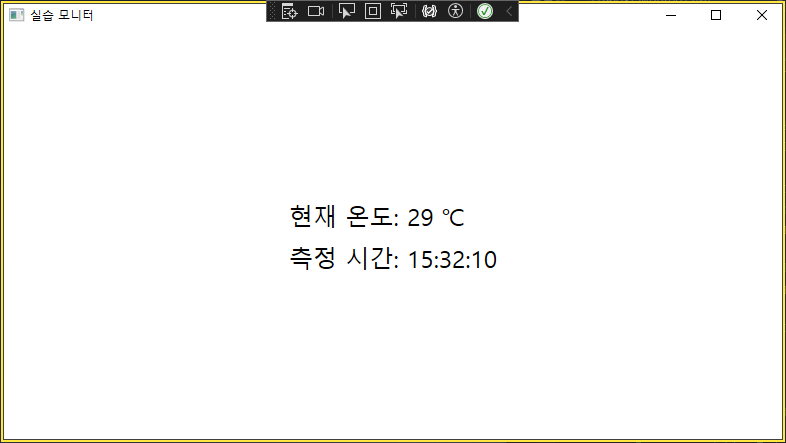
2단계: DTO 클래스 + 자동 속성 실습
- 목적: 현재 시간과 가짜 온도값을 DTO에 담고, 이를 화면에 표시하기
XAML 파일
<Window x:Class="WpfApp1.MainWindow"
        xmlns="http://schemas.microsoft.com/winfx/2006/xaml/presentation"
        xmlns:x="http://schemas.microsoft.com/winfx/2006/xaml"
        xmlns:d="http://schemas.microsoft.com/expression/blend/2008"
        xmlns:mc="http://schemas.openxmlformats.org/markup-compatibility/2006"
        xmlns:local="clr-namespace:WpfApp1"
        mc:Ignorable="d"
        Title="실습 모니터" Height="450" Width="800">
    <Grid>
        <StackPanel HorizontalAlignment="Center" VerticalAlignment="Center">
            <Label x:Name="lblTemp" FontSize="24" Content="온도값: ___"/>
            <Label x:Name="lblTime" FontSize="24" Content="시간: ___"/>
        </StackPanel>
    </Grid>
</Window>C# 파일
using System;
using System.ComponentModel.DataAnnotations;
using System.Windows;
using System.Windows.Threading;

namespace WpfApp1
{
    public partial class MainWindow : Window
    {
        private DispatcherTimer _timer;

        public MainWindow()
        {
            InitializeComponent();

            _timer = new DispatcherTimer
            {
                Interval = TimeSpan.FromSeconds(1)
            };
            _timer.Tick += Timer_Tick;
            _timer.Start();
        }

        private void Timer_Tick(object sender, EventArgs e)
        {
            var dto = new TemperatureDto
            {
                Temperature = new Random().Next(20, 35), // set 호출
                Timestamp = DateTime.Now // set 호출
            };

            lblTemp.Content = $"현재 온도: {dto.Temperature} ℃"; // get 호출
            lblTime.Content = $"측정 시간: {dto.Timestamp:HH:mm:ss}"; // get 호출
        }
    }
}Dto 파일
using System;
using System.Collections.Generic;
using System.Linq;
using System.Text;
using System.Threading.Tasks;

namespace WpfApp1
{
    public class TemperatureDto
    {
        public int Temperature { get; set; }
        public DateTime Timestamp { get; set; }
    }
}결과

직접 getter와 setter를 구성하지 않았는데도 자동으로 설정을 해준다.
C# 컴파일러가 자동으로 아래와 같은 내부 코드를 생성해주기 때문이다.
private int _temperature;

public int Temperature
{
	get { return _temperature; }
    set { _temperature = value; }
}
따라서 C++에서는 dto.setTemperature(25);와 같은 방식으로 값을 넣거나 dto.getTemperature();로 값을 읽었지만
C#에서는 dto.Temperature = 25; 를 하게되면 내부적으로 set을 호출해주고 dto.Temperature를 하면 get을 호출해준다.
3단계: 간단한 ViewModel 구성 + Binding 연습
- 목적: 온도와 시간을 담은 DTO를 ViewModel에 포함시키고, XAML에서 {Binding ...} 문법으로 Label과 자동 연결
XAML 파일
<Window x:Class="WpfApp1.MainWindow"
        xmlns="http://schemas.microsoft.com/winfx/2006/xaml/presentation"
        xmlns:x="http://schemas.microsoft.com/winfx/2006/xaml"
        xmlns:d="http://schemas.microsoft.com/expression/blend/2008"
        xmlns:mc="http://schemas.openxmlformats.org/markup-compatibility/2006"
        xmlns:local="clr-namespace:WpfApp1"
        mc:Ignorable="d"
        Title="실습 모니터" Height="450" Width="800">
    <Grid>
        <StackPanel HorizontalAlignment="Center" VerticalAlignment="Center">
            <Label FontSize="24" Content="{Binding TemperatureText}"/>
            <Label FontSize="24" Content="{Binding TimeText}"/>
        </StackPanel>
    </Grid>
</Window>
x:Name 대신 Binding을 사용한 구성
C# 파일
using System;
using System.ComponentModel.DataAnnotations;
using System.Windows;
using System.Windows.Threading;

namespace WpfApp1
{
    public partial class MainWindow : Window
    {
        private DispatcherTimer _timer;
        private MainViewModel _viewModel;

        public MainWindow()
        {
            InitializeComponent();

            _viewModel = new MainViewModel();
            // View와 ViewModel 연결
            // XAML에서 {Binding Temperature} 같은 문법을 동작시킨다.
            this.DataContext = _viewModel;

            _timer = new DispatcherTimer
            {
                Interval = TimeSpan.FromSeconds(1)
            };
            _timer.Tick += Timer_Tick;
            _timer.Start();
        }

        private void Timer_Tick(object sender, EventArgs e)
        {

            _viewModel.Temperature = new Random().Next(20, 35); // set 호출
            _viewModel.Timestamp = DateTime.Now; // set 호출

        }
    }
}ViewModel 파일
using System;
using System.ComponentModel;

// INotifyPropertyChanged
// 이 인터페이스는 WPF에게 속성 값이 바뀌면 알려주는 장치이다.
// 이를 통해 UI를 자동 갱신이 가능하다.
public class MainViewModel : INotifyPropertyChanged
{
    private int _temperature;

    // 이전에 사용했던 get; set;은 간단하게 값을 저장할 때 유용하다.
    // 여기서는 속성 값이 바뀔 때 UI에 알려야 하므로 수동 속성이 필요하다.
    public int Temperature
    {
        get => _temperature;
        set
        {
            _temperature = value;
            // 2번 호출하는 이유
            // TemperatureText는 직접 바뀌는 속성이 아니기 때문이다.
            // TemperatureText는 Temperature를 기반으로 계산되는 값이다.
            OnPropertyChanged(nameof(Temperature));     // 데이터 속성 변경 알림
            OnPropertyChanged(nameof(TemperatureText)); // 계산 속성도 같이 알림
        }
    }

    private DateTime _timestamp;
    public DateTime Timestamp
    {
        get => _timestamp;
        set
        {
            _timestamp = value;
            OnPropertyChanged(nameof(Timestamp));
            OnPropertyChanged(nameof(TimeText));
        }
    }

    // MVVM 핵심 : 속성 변경 알림 인터페이스
    // 속성 값이 바뀌면 이벤트를 발생시켜서 WPF 내부에서 다시 UI 렌더링을 한다.
    public event PropertyChangedEventHandler PropertyChanged;
    protected void OnPropertyChanged(string propName) =>
        PropertyChanged?.Invoke(this, new PropertyChangedEventArgs(propName));

    public string TemperatureText => $"현재 온도: {Temperature} ℃";
    public string TimeText => $"측정 시간: {Timestamp:HH:mm:ss}";

}결과
2번의 DTO때 와는 다르게 속성 값이 바뀔 때 UI에 알려야 하므로 직접 get과 set을 구성하여야 한다.
아래와 같은 방식으로 구성해야 데이터 속성과 계산 속성이 둘다 변경이 된다.
    public int Temperature
    {
        get => _temperature;
        set
        {
            _temperature = value;
            // 2번 호출하는 이유
            // TemperatureText는 직접 바뀌는 속성이 아니기 때문이다.
            // TemperatureText는 Temperature를 기반으로 계산되는 값이다.
            OnPropertyChanged(nameof(Temperature));     // 데이터 속성 변경 알림
            OnPropertyChanged(nameof(TemperatureText)); // 계산 속성도 같이 알림
        }
    }


// MVVM 핵심 : 속성 변경 알림 인터페이스
// 속성 값이 바뀌면 이벤트를 발생시켜서 WPF 내부에서 다시 UI 렌더링을 한다.
public event PropertyChangedEventHandler PropertyChanged;
protected void OnPropertyChanged(string propName) =>
    PropertyChanged?.Invoke(this, new PropertyChangedEventArgs(propName));


public string TemperatureText => $"현재 온도: {Temperature} ℃";
Temperature만 쓰면 안되고 C#의 바인딩 시스템은 속성이 직접 바뀌었는지만 감지하기 때문에 계산된 속성은 반드시 수동으로 알림(OnPropertyChanged)을 줘야 UI가 다시 그린다.
그래서 위와 같이 이벤트를 만들어서 바뀐것을 알려줘야 다시 랜더링이 된다.
그렇다면 1,2에서 사용하던 x:Name으로 접근하면 더욱 간단한데 굳이 불편하게 Binding을 써서 이벤트까지 만들어야 하는 이유가 무엇일까?
이는 단순한 문법의 문제가 아닌 WPF의 가장 중요한 설계 철학인 MVVM 패턴과 관련된 내용이다.
x:Name은 빠르고 직관적이지만 유지보수/재사용/테스트에 약하다.
{Binding}은 처음에는 번거롭지만 확장성, 분리, 자동화, 재사용성에 훨씬 강하다.
특히 View와 로직 결합도 측면에서 x:Name은 강하게 종속되며 Binding은 완전 분리가 가능하다는 이점이 있다.
WPF는 디자인과 로직을 완전히 분리하는 아키텍처를 기본 철학으로 삼고 있고 이를 통해 디자이너와 개발자는 담당역할을 효율적으로 수행할 수 있게되고 테스트 또한 ViewModel 단위로 가능해진다.
4단계: PLC 통신 프로그램
- 목적: MVVM 구조를 갖춘 PLC 통신 프로그램 만들기
XAML 파일
<Window x:Class="WpfApp1.MainWindow"
        xmlns="http://schemas.microsoft.com/winfx/2006/xaml/presentation"
        xmlns:x="http://schemas.microsoft.com/winfx/2006/xaml"
        xmlns:d="http://schemas.microsoft.com/expression/blend/2008"
        xmlns:mc="http://schemas.openxmlformats.org/markup-compatibility/2006"
        xmlns:local="clr-namespace:WpfApp1"
        mc:Ignorable="d"
        Title="실습 모니터" Height="450" Width="800">
    <Grid>
        <StackPanel HorizontalAlignment="Center" VerticalAlignment="Center">
            <Label FontSize="24" Content="{Binding TemperatureText}"/>
            <Label FontSize="24" Content="{Binding TimeText}"/>
        </StackPanel>
    </Grid>
</Window>
x:Name 대신 Binding을 사용한 구성
C# 파일
using System;
using System.Windows;

namespace WpfApp1
{
    public partial class MainWindow : Window
    {
        public MainWindow()
        {
            InitializeComponent();
            this.DataContext = new MainViewModel();

        }
    }
}ViewModel 파일
using System;
using System.ComponentModel;
using System.Threading.Tasks;
using System.Windows.Threading;

// INotifyPropertyChanged
// 이 인터페이스는 WPF에게 속성 값이 바뀌면 알려주는 장치이다.
// 이를 통해 UI를 자동 갱신이 가능하다.
public class MainViewModel : INotifyPropertyChanged
{
    public event PropertyChangedEventHandler PropertyChanged;

    private string _temperatureText = "읽는 중...";
    public string TemperatureText
    {
        get => _temperatureText;
        set
        {
            _temperatureText = value;
            OnPropertyChanged(nameof(TemperatureText));
        }
    }

    private string _statusText = "대기 중...";
    public string StatusText
    {
        get => _statusText;
        set
        {
            _statusText = value;
            OnPropertyChanged(nameof(StatusText));
        }
    }

    private readonly DispatcherTimer _timer;

    public MainViewModel()
    {
        _timer = new DispatcherTimer
        {
            Interval = TimeSpan.FromMilliseconds(500)
        };
        _timer.Tick += async (s, e) => await UpdateAsync();
        _timer.Start();
    }

    private async Task UpdateAsync()
    {
        try
        {
            ushort value = await PlcReader.ReadD100Async("192.168.0.180", 2000);
            TemperatureText = $"현재 온도 : {value}";
            StatusText = $"{DateTime.Now:HH:mm:ss} 업데이트";
        }
        catch (Exception ex)
        {
            StatusText = $"오류 : {ex.Message}";
        }
    }

    private void OnPropertyChanged(string name) =>
        PropertyChanged?.Invoke(this, new PropertyChangedEventArgs(name));
}PLC 통신 유틸리티 파일
using System;
using System.Globalization;
using System.IO;
using System.Net.Sockets;
using System.Text;
using System.Threading;
using System.Threading.Tasks;

public static class PlcReader
{
    public static async Task<ushort> ReadD100Async(string ip, int port)
    {
        string request =
            "5000" +      // 서브헤더
            "00" +        // Network No
            "FF" +        // PLC No
            "03FF" +      // I/O 번호
            "00" +        // 국번
            "0018" +      // 길이
            "0010" +      // 타임아웃
            "0401" +      // 커맨드 (워드 읽기)
            "0000" +      // 서브 커맨드
            "D*" +        // 디바이스
            "000100" +    // D100 주소
            "0001";       // 워드 수

        using var cts = new CancellationTokenSource(TimeSpan.FromSeconds(2));
        using var client = new TcpClient();
        await client.ConnectAsync(ip, port, cts.Token);
        using var stream = client.GetStream();

        byte[] sendBytes = Encoding.ASCII.GetBytes(request);
        await stream.WriteAsync(sendBytes, 0, sendBytes.Length, cts.Token);

        byte[] recvBytes = new byte[1024];
        int length = await stream.ReadAsync(recvBytes, 0, recvBytes.Length, cts.Token);

        string response = Encoding.ASCII.GetString(recvBytes, 0, length);
        string dataHex = response[^4..];

        if (!ushort.TryParse(dataHex, NumberStyles.HexNumber, null, out var result))
            throw new FormatException("16진수 파싱 오류");

        return result;
    }
}결과

3번 실습과 다른 부분
private string _temperatureText = "읽는 중...";
public string TemperatureText
{
    get => _temperatureText;
    set
    {
        _temperatureText = value;
        OnPropertyChanged(nameof(TemperatureText));
    }
}


ushort value = await PlcReader.ReadD100Async("192.168.0.180", 2000);
TemperatureText = $"현재 온도 : {value}";
StatusText = $"{DateTime.Now:HH:mm:ss} 업데이트";
3번 실습에서는 OnPropertyChanged를 두번 써서 값과 TemperatureText를 둘다 알려주었지만 4번 실습에서는 문자열을 한꺼번에 만들어서 넣는 구조를 통해 OnPropertyChanged를 1회만 호출하였다.
MainWindow.xaml.cs 파일에는 코드를 ViewModel과 Plc 통신 유틸리티 파일로 분리하여 MVVM 구조에 따라 View와 ViewModel을 연결만 해주는 역할만 부여하였다.
5단계: LiveCharts2로 실시간 그래프 출력
- 목적: LiveCharts2를 활용하여 현재 온도와 설정 온도 값을 실시간으로 표시하기
XAML 파일
<Window x:Class="WpfApp1.MainWindow"
        xmlns="http://schemas.microsoft.com/winfx/2006/xaml/presentation"
        xmlns:x="http://schemas.microsoft.com/winfx/2006/xaml"
        xmlns:d="http://schemas.microsoft.com/expression/blend/2008"
        xmlns:mc="http://schemas.openxmlformats.org/markup-compatibility/2006"
        xmlns:lvc="clr-namespace:LiveChartsCore.SkiaSharpView.WPF;assembly=LiveChartsCore.SkiaSharpView.WPF"
        xmlns:local="clr-namespace:WpfApp1"
        mc:Ignorable="d"
        Title="실습 모니터" Height="700" Width="1200">
    <Grid>
        <StackPanel Margin="10">
            <lvc:CartesianChart
                Series="{Binding Series}"
                XAxes="{Binding XAxes}"
                YAxes="{Binding YAxes}"
                Height="500" />

            <Label FontSize="20" Content="{Binding TemperatureText}" Margin="0,10"/>
            <Label FontSize="20" Content="{Binding SetpointText}" Margin="0,5"/>

            <StackPanel Orientation="Horizontal" HorizontalAlignment="Left" Margin="0,5">
                <TextBox Width="80" FontSize="16" Text="{Binding TargetInput, UpdateSourceTrigger=PropertyChanged}" />
                <Button Content="설정하기" FontSize="16" Margin="5,0" Click="SetTarget_Click" />
            </StackPanel>

            <Label FontSize="14" Content="{Binding StatusText}" />
        </StackPanel>
    </Grid>
</Window>
C# 파일
using System;
using System.Windows;
using System.Windows.Controls;

namespace WpfApp1
{
    public partial class MainWindow : Window
    {
        public MainWindow()
        {
            InitializeComponent();
            this.DataContext = new MainViewModel();
        }

        private async void SetTarget_Click(object sender, RoutedEventArgs e)
        {
            if (DataContext is MainViewModel vm && float.TryParse(vm.TargetInput, out float inputValue))
            {
                try
                {
                    ushort scaledValue = (ushort)(inputValue * 10);
                    await PlcReader.WriteWordAsync("192.168.0.180", 2000, "000017", scaledValue); // D17
                    vm.StatusText = $"목표 온도 {inputValue}℃ 설정 완료";
                }
                catch (Exception ex)
                {
                    vm.StatusText = $"설정 실패: {ex.Message}";
                }
                vm.OnPropertyChanged(nameof(vm.StatusText));
            }
        }
    }
}
ViewModel 파일
using LiveChartsCore;
using LiveChartsCore.SkiaSharpView;
using LiveChartsCore.SkiaSharpView.WPF;
using LiveChartsCore.SkiaSharpView.Drawing.Geometries;
using LiveChartsCore.Defaults;
using System;
using System.Collections.ObjectModel;
using System.ComponentModel;
using System.Threading.Tasks;
using System.Windows.Threading;
using LiveChartsCore.Measure;
using LiveChartsCore.Kernel.Sketches;

public class MainViewModel : INotifyPropertyChanged
{
    public event PropertyChangedEventHandler PropertyChanged;

    private const int MaxPoints = 60;

    public ObservableCollection<ObservablePoint> CurrentValues { get; set; } = new();
    public ObservableCollection<ObservablePoint> SetpointValues { get; set; } = new();

    public ISeries[] Series { get; set; }
    public Axis[] XAxes { get; set; }
    public Axis[] YAxes { get; set; }

    public string TemperatureText { get; set; } = "현재 온도: -";
    public string SetpointText { get; set; } = "설정 온도: -";
    public string StatusText { get; set; } = "대기 중...";
    public string TargetInput { get; set; } = "";

    private readonly DispatcherTimer _timer;

    public MainViewModel()
    {
        Series = new ISeries[]
        {
            new LineSeries<ObservablePoint>
            {
                Values = CurrentValues,
                Name = "PV",
                GeometrySize = 5,
                Fill = null
            },
            new LineSeries<ObservablePoint>
            {
                Values = SetpointValues,
                Name = "SV",
                GeometrySize = 5,
                Fill = null
            }
        };

        XAxes = new Axis[]
        {
                new Axis
                {
                    Labeler = value =>
                    {
                        try
                        {
                            return DateTime.FromOADate(value).ToString("HH:mm:ss");
                        }
                        catch
                        {
                            return ""; // 혹은 "에러"
                        }
                    },
                    UnitWidth = TimeSpan.FromSeconds(1).TotalDays,
                    LabelsRotation = 15,
                    Name = "Time"
                }
        };
        YAxes = new Axis[] { new Axis { Name = "Temp", MinLimit = 0, MaxLimit = 60 } };

        _timer = new DispatcherTimer
        {
            Interval = TimeSpan.FromMilliseconds(500)
        };
        _timer.Tick += async (s, e) => await UpdateAsync();
        _timer.Start();
    }

    private async Task UpdateAsync()
    {
        try
        {
            (ushort temp, ushort setpoint) = await PlcReader.ReadD100_101Async("192.168.0.180", 2000);

            double tempC = temp / 10.0;
            double setpointC = setpoint / 10.0;
            double timeX = DateTime.Now.ToOADate();

            TemperatureText = $"현재 온도: {tempC:F1} ℃";
            SetpointText = $"설정 온도: {setpointC:F1} ℃";
            StatusText = $"{DateTime.Now:HH:mm:ss} 업데이트";

            CurrentValues.Add(new ObservablePoint(timeX, tempC));
            SetpointValues.Add(new ObservablePoint(timeX, setpointC));

            if (CurrentValues.Count > MaxPoints) CurrentValues.RemoveAt(0);
            if (SetpointValues.Count > MaxPoints) SetpointValues.RemoveAt(0);
        }
        catch (Exception ex)
        {
            StatusText = $"오류: {ex.Message}";
        }

        OnPropertyChanged(nameof(TemperatureText));
        OnPropertyChanged(nameof(SetpointText));
        OnPropertyChanged(nameof(StatusText));
    }

    public void OnPropertyChanged(string name) =>
        PropertyChanged?.Invoke(this, new PropertyChangedEventArgs(name));
}
LiveCharts2를 사용하여 실시간 그래프를 만들었다.
ISeries 인터페이스를 사용하여 두개의 라인 차트(현재 온도, 설정 온도)를 사용
DispatcherTimer를 사용하여 0.5초마다 현재 온도, 설정 온도를 PLC로 부터 요청하여 데이터를 읽어오고 시간과 함께 업데이트 한다.
PLC 통신 유틸리티 파일
using System;
using System.Globalization;
using System.IO;
using System.Net.Sockets;
using System.Text;
using System.Threading;
using System.Threading.Tasks;

public static class PlcReader
{
    public static async Task<(ushort, ushort)> ReadD100_101Async(string ip, int port)
    {
        string request =
            "5000" +      // 서브헤더
            "00" +        // Network No
            "FF" +        // PLC No
            "03FF" +      // I/O 번호
            "00" +        // 국번
            "0018" +      // 길이
            "0010" +      // 타임아웃
            "0401" +      // 커맨드 (워드 읽기)
            "0000" +      // 서브 커맨드
            "D*" +        // 디바이스
            "000100" +    // D100 주소
            "0002";       // 워드 수

        using var cts = new CancellationTokenSource(TimeSpan.FromSeconds(2));
        using var client = new TcpClient();
        await client.ConnectAsync(ip, port, cts.Token);
        using var stream = client.GetStream();

        byte[] sendBytes = Encoding.ASCII.GetBytes(request);
        await stream.WriteAsync(sendBytes, 0, sendBytes.Length, cts.Token);

        byte[] recvBytes = new byte[1024];
        int length = await stream.ReadAsync(recvBytes, 0, recvBytes.Length, cts.Token);

        string response = Encoding.ASCII.GetString(recvBytes, 0, length);
        string dataHex = response[^8..];

        ushort d100 = Convert.ToUInt16(dataHex[..4], 16);
        ushort d101 = Convert.ToUInt16(dataHex[4..], 16);

        return (d100, d101);
    }

    public static async Task WriteWordAsync(string ip, int port, string addressHex, ushort value)
    {

        string hexValue = value.ToString("X4");
        string request = "500000FF03FF00001C001014010000D*" + addressHex + "0001" + hexValue;

        using var cts = new CancellationTokenSource(TimeSpan.FromSeconds(2));
        using var client = new TcpClient();
        await client.ConnectAsync(ip, port, cts.Token);
        using var stream = client.GetStream();

        byte[] sendBytes = Encoding.ASCII.GetBytes(request);
        await stream.WriteAsync(sendBytes, 0, sendBytes.Length, cts.Token);

        byte[] recvBytes = new byte[1024];
        await stream.ReadAsync(recvBytes, 0, recvBytes.Length, cts.Token); // 응답 확인만
    }
}
D100, D101을 가져와야 하므로 2 워드를 가져와 ^8..을 통해 뒤의 8개를 때어내 파싱한다.
WirteWordAsync를 만들어서 설정 온도(SV)를 수정할 수 있도록 만들었다.
결과

실시간 그래프를 통해 PLC로 부터 가져온 데이터를 표시해 보았다.
또한 UI의 Blocking 없이 처리되도록 Async/Await을 통신 처리에 달았다.